In order to upload products correctly, you must first verify your EPREL account.
Step 1. Activate you certificate request
As soon as we process your eQSeal certificate request, you will receive an activation key via email, together with a link for you to activate your application yourself.
Note: This email will be sent to the email account indicated in the application form.
To activate your application, simply:
- Access the link and enter the activation key.
- You will then be asked to create a login password for your ANF AC account. This password must be between 10 and 15 characters long, and contain upper and lower case letters, as well as numbers and symbols (at least one of each).
- Finally, you will be asked to set a PIN for your certificate. This password must also be between 10 and 15 characters long and contain uppercase and lowercase letters, numbers and symbols (at least one of each).
Once the activation is completed, our Validation team will review your request within 24-48 hours. You will be notified by email if any documents need to be provided or corrected, as well as to confirm that the certificate has been issued.
Step 2. Download and install ANF Criptographic Services.
As we mentioned, once your eQSeal Certificate is issued, you will receive another email confirming it. This email includes a link to download our ANF Cryptographic Services middleware, as well as instructions on its installation (it is very simple).
Once the installation is finished, the program will ask you to restart your computer.
Some considerations to take into account:
- To install the program, you need administrator permissions on your computer.
The program checks for updates automatically. In the future, you may see a window warning you that an update is available, where you can choose to update now or later. - It is important that you always update the software to have the latest changes and to ensure the security of the program.
- While the program is updating, you will not be able to use the electronic certificate until the update is complete. Normally it is not necessary to restart after upgrading.
Step 3. Login to ANF Criptographic Services.
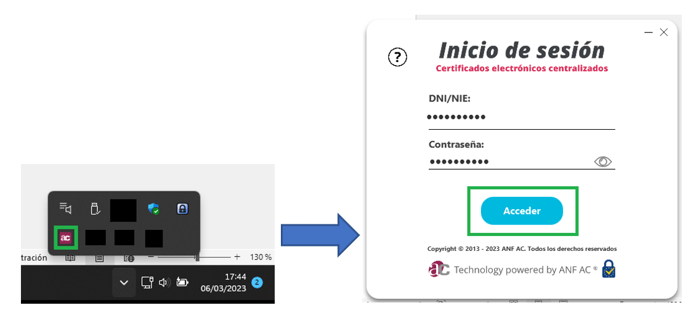
Once you have installed our software, you will need to log in to have your eQSeal Certificate available on your computer.
To do so, click on the AC icon with the maroon background located in the icon tray (bottom right of your Desktop), and enter your login details:
Step 4. Login to your EPREL account and ANF Documents Sign & Validation website
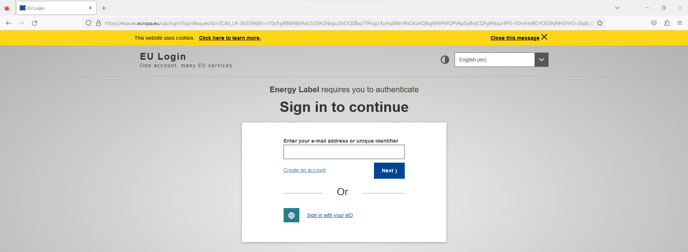
In this step you will need to open 2 new tabs in your browser with these websites:
- https://validacion.anf.es

- https://energy-label.ec.europa.eu
Step 5. Configure your organization's data in EPREL.
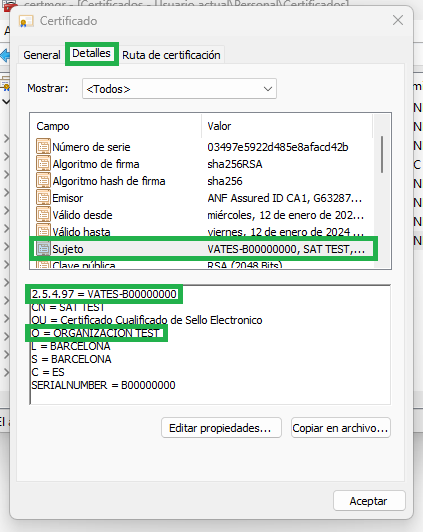
In order to verify your EPREL account, it is necessary that the data contained in the Company Data form is exactly the same as that contained in your EPREL seal; in particular the Organization Name and Organization Identifier fields.
You can check them out in your Windows certificate store. To do so:
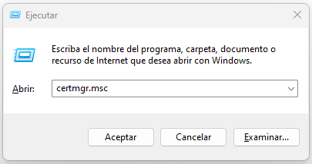
- Simultaneously press the Windows and R keys, and run certmgr.msc
- Search for your eQSeal certificate in your User Personal certificate repository
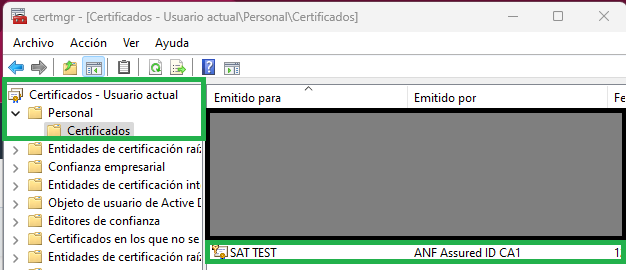
- In the Details tab, select the Subject field and there you will find the Organization Name and Identifier data to be entered in your EPREL account.
Step 6. Start your EPREL verification
Now, in your EPREL account, you must go to the section Verify and select Start Verification.
First, the site will ask your name, surname and email address. Here you must enter the data related to the person who owns the eQSeal.
After that, you will need to download the verification document. This is a PDF document that EPREL sends you via email, but you will can also download it from that page refreshing it with the Refresh button.
Once you have the verification document, you need to sign the document with your eQSeal. To do so, you need to go to the other tab where you previously logged into validacion.anf.es, select electronic Sign and select the verification document:

The next step is select your eQSeal Certificate (in case you have more than one ANF AC certificate) and press the Sign button.
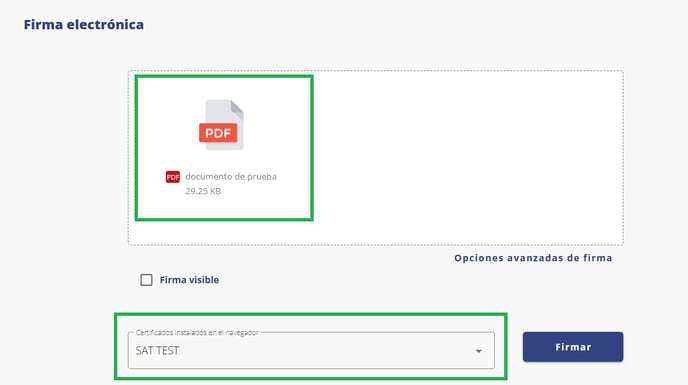
Once you have done this, your signed verification document will be automatically downloaded.
Step 7. Complete the verification.
The last step is to upload the signed verification document, in order to finish the verification process. Just click in the Upload & Verify button, and refresh the page with the Refresh button.
If everything is right, a green message with the text VERIFICATION COMPLETE will be displayed and you will can start uploading and registering your products.
